Solving Problems that Occur when Using Microchip Studio and Parallels Desktop VM Together
Background of the Problems
I’ve enrolled in a course whose main content is AVR assembly language this semester. In the lab of this course, we have to use an IDE called Microchip Studio (aka. Atmel Studio) to develop, debug, and test AVR assembler programs. Since I mainly use macOS and Microchip Studio supports only Windows, I need to use this IDE with a Windows 11 virtual machine.
I used Parallels Desktop, the virtualization software that I mainly used, and its official wizard (Get Windows 11 from Microsoft) to create a Windows 11 VM, then successfully installed Microchip Studio in it. However, I encountered some weird problems when I started using Microchip Studio.
What the Problems are
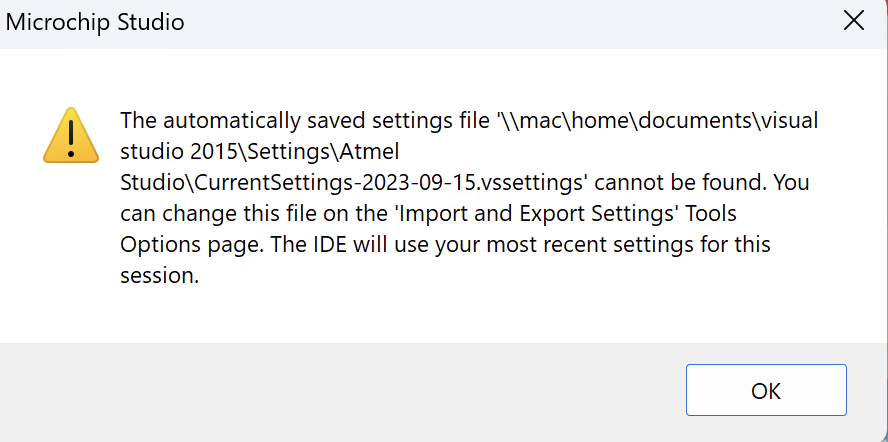
A Warning was Generated on Startup
A warning is generated every time Microchip Studio starts.
The Layout is Weird
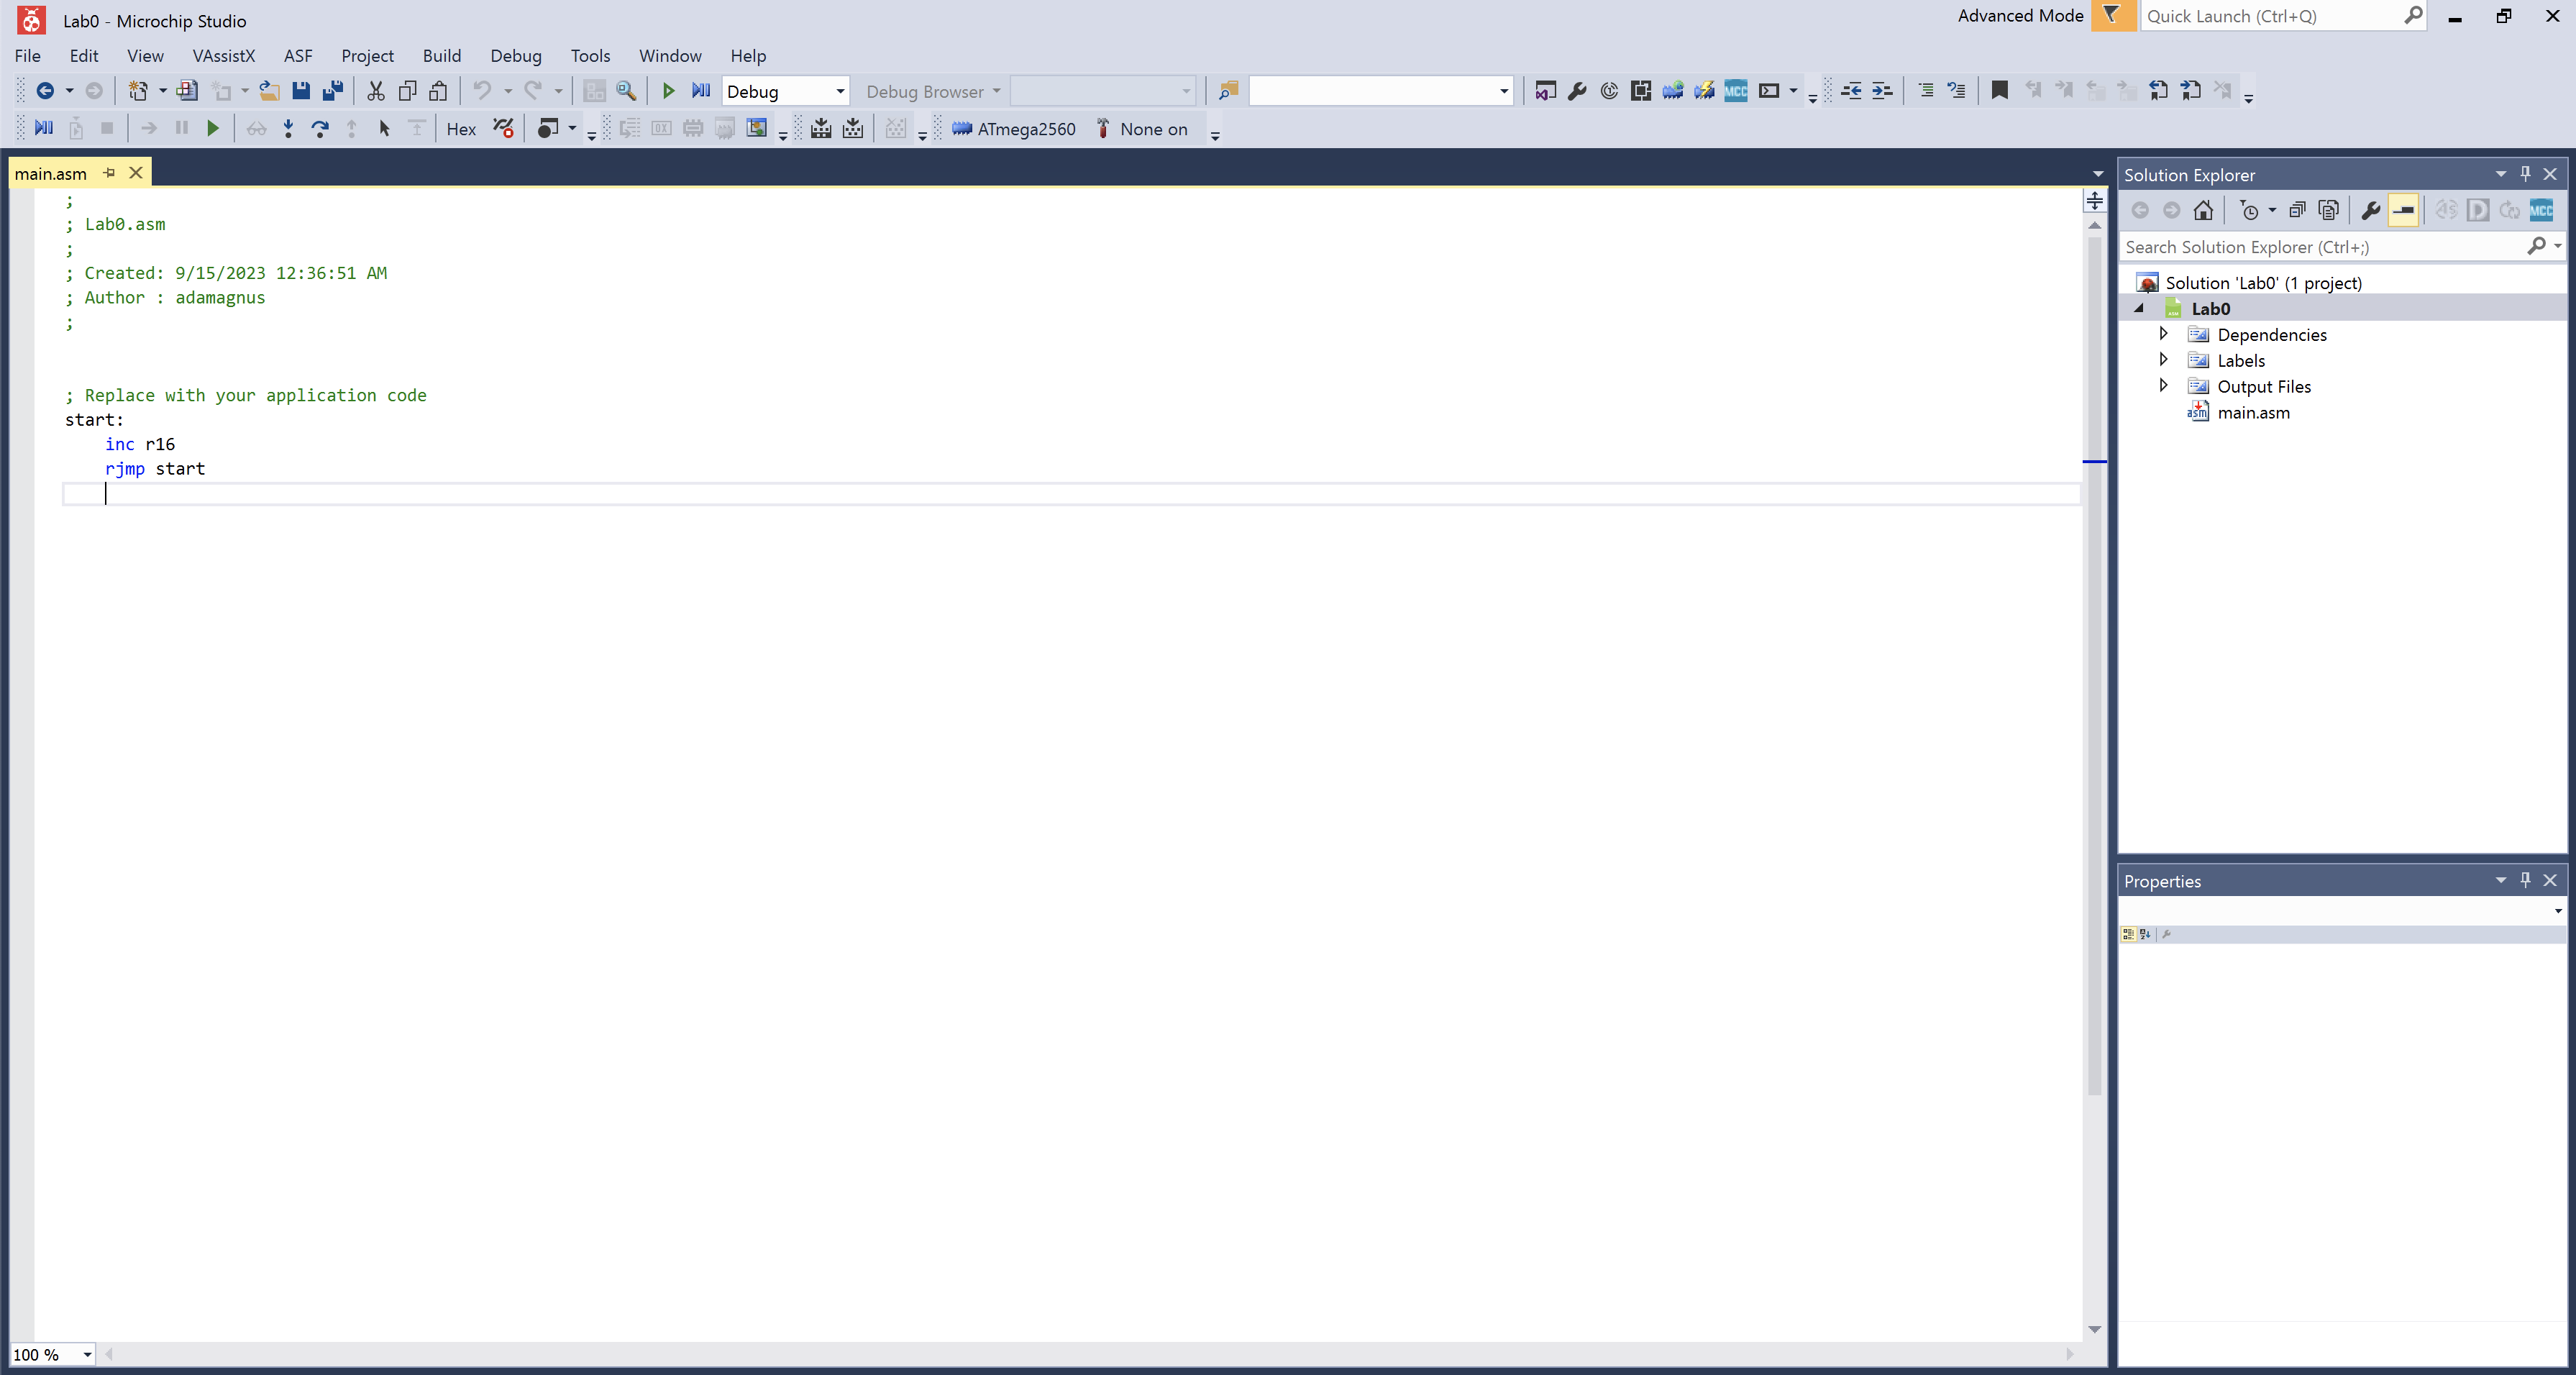
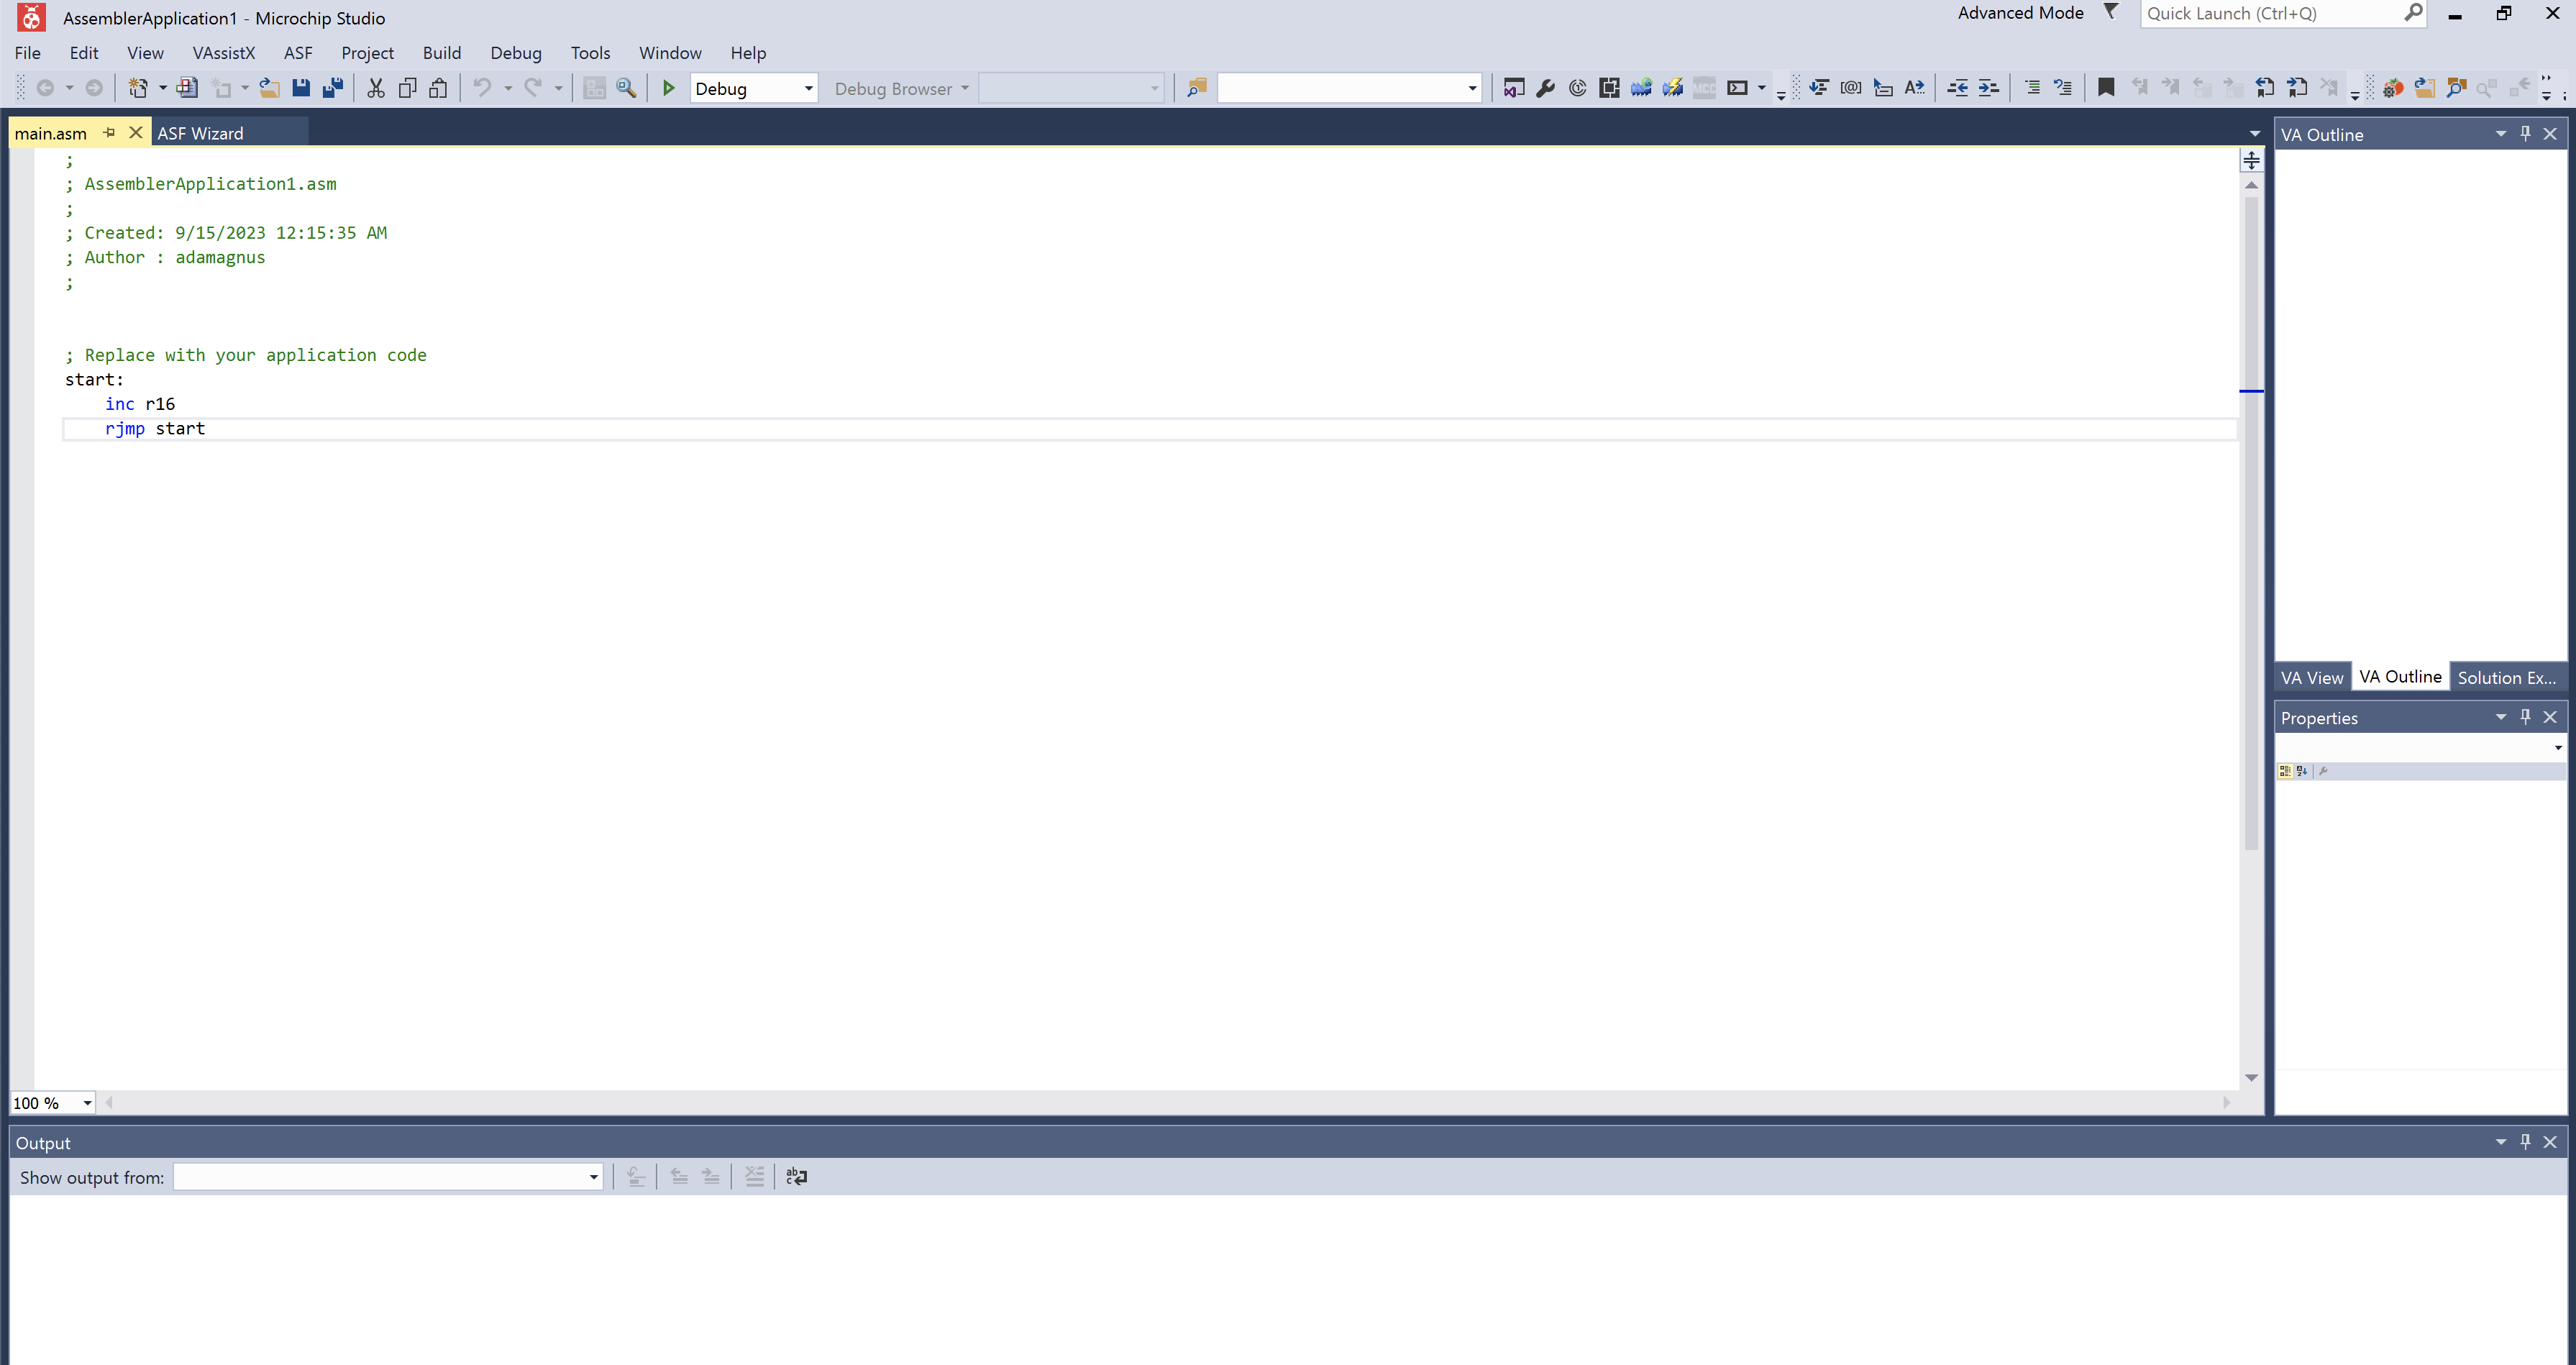
The layout of Microchip Studio is different from that of other Microchip Studios that run on Windows PCs.
The normal layout looks like this:
This weird layout looks like this:
Some Output Information was Missing when Building Projects
Some output information, like memory usage, should be shown in the Output window when building ATmega2560 assembler projects, but such information was missing.
The correct output looks like this:

This wrong output looks like this:

Breakpoints didn’t Work Correctly
Microchip Studio will ignore breakpoints set by the user and insert new breakpoints while debugging.
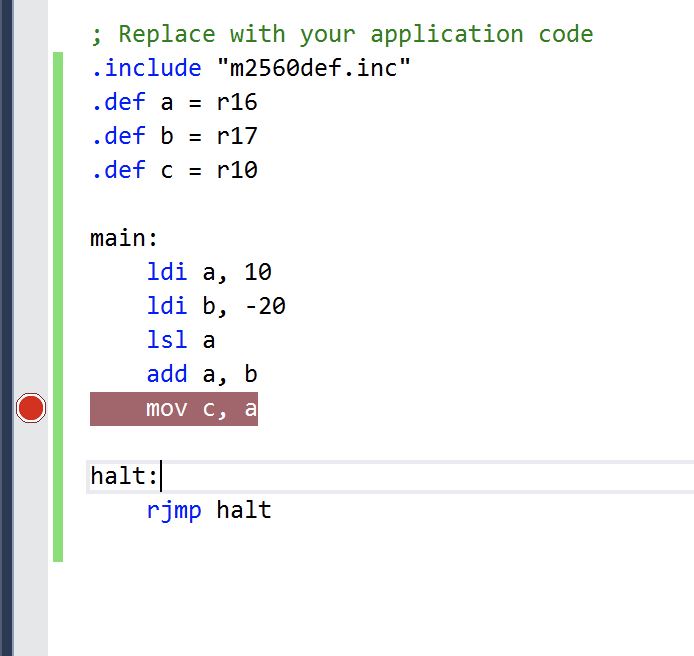
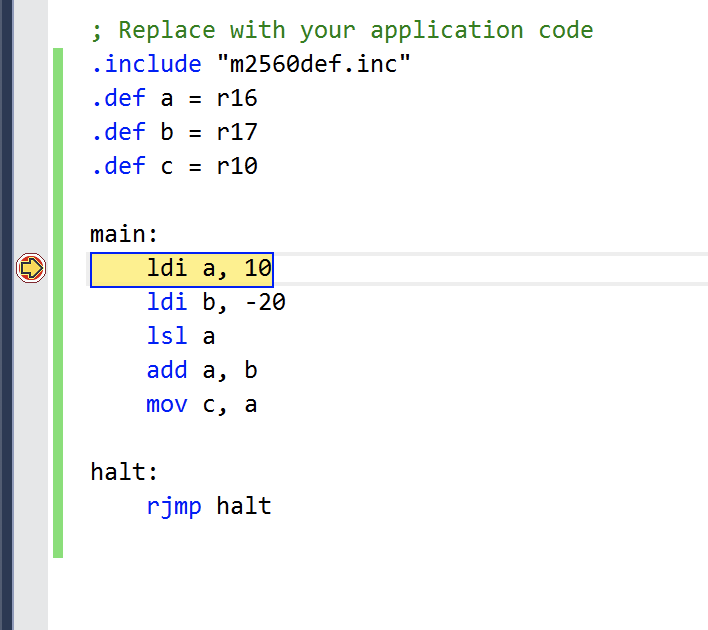
For example, we set a breakpoint on the line mov c, a (line 20). The program is expected to stop executing in line 20 after starting debugging, but the breakpoint has been automatically changed to the line ldi a, 10 (line 16). What’s worse, we can’t set breakpoints on any line except line 16.
Before starting debugging, the breakpoint was set on the line mov c, a like this:
After starting debugging, the breakpoint was moved to the line ldi a, 10 like this:
How to Solve these Problems
Reset All Settings
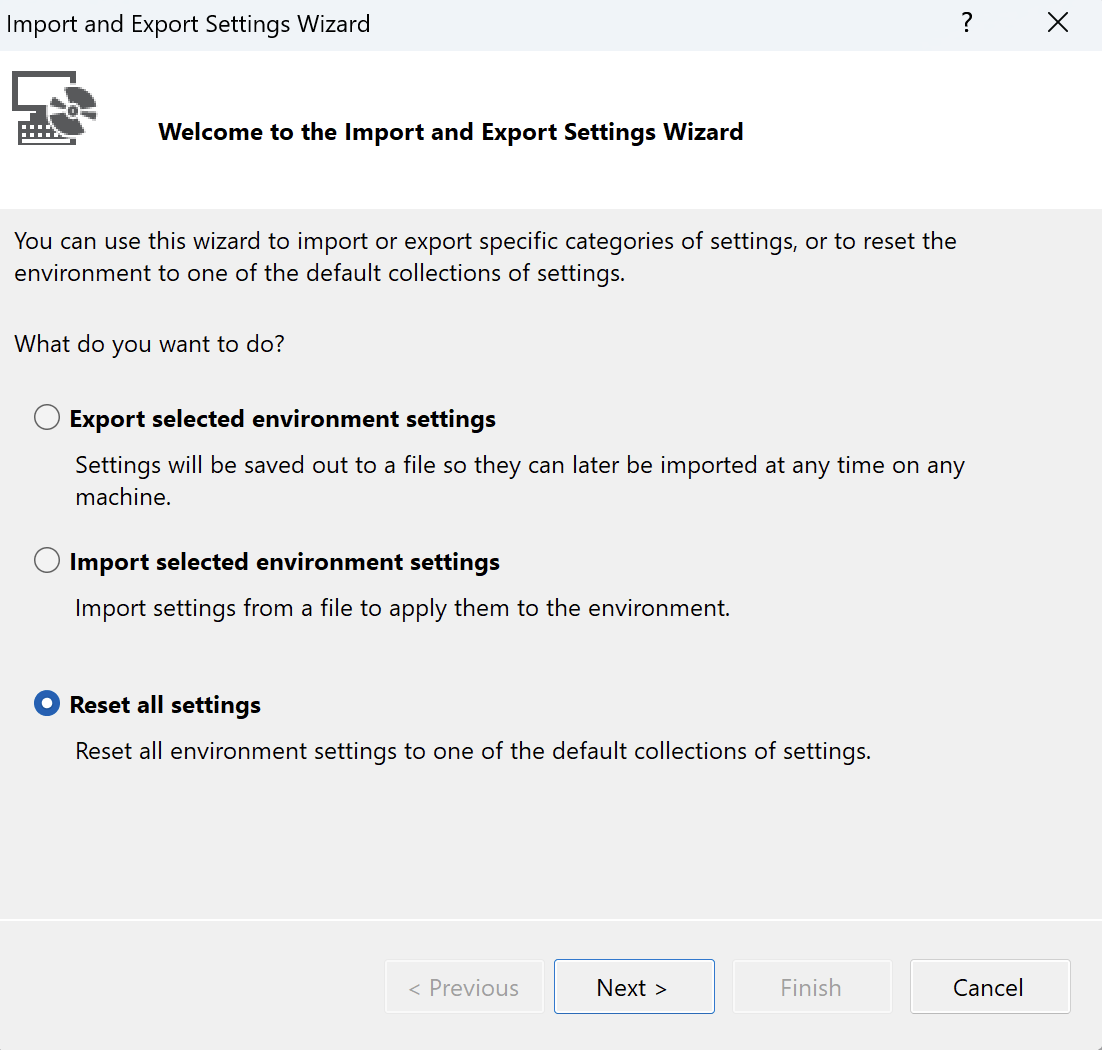
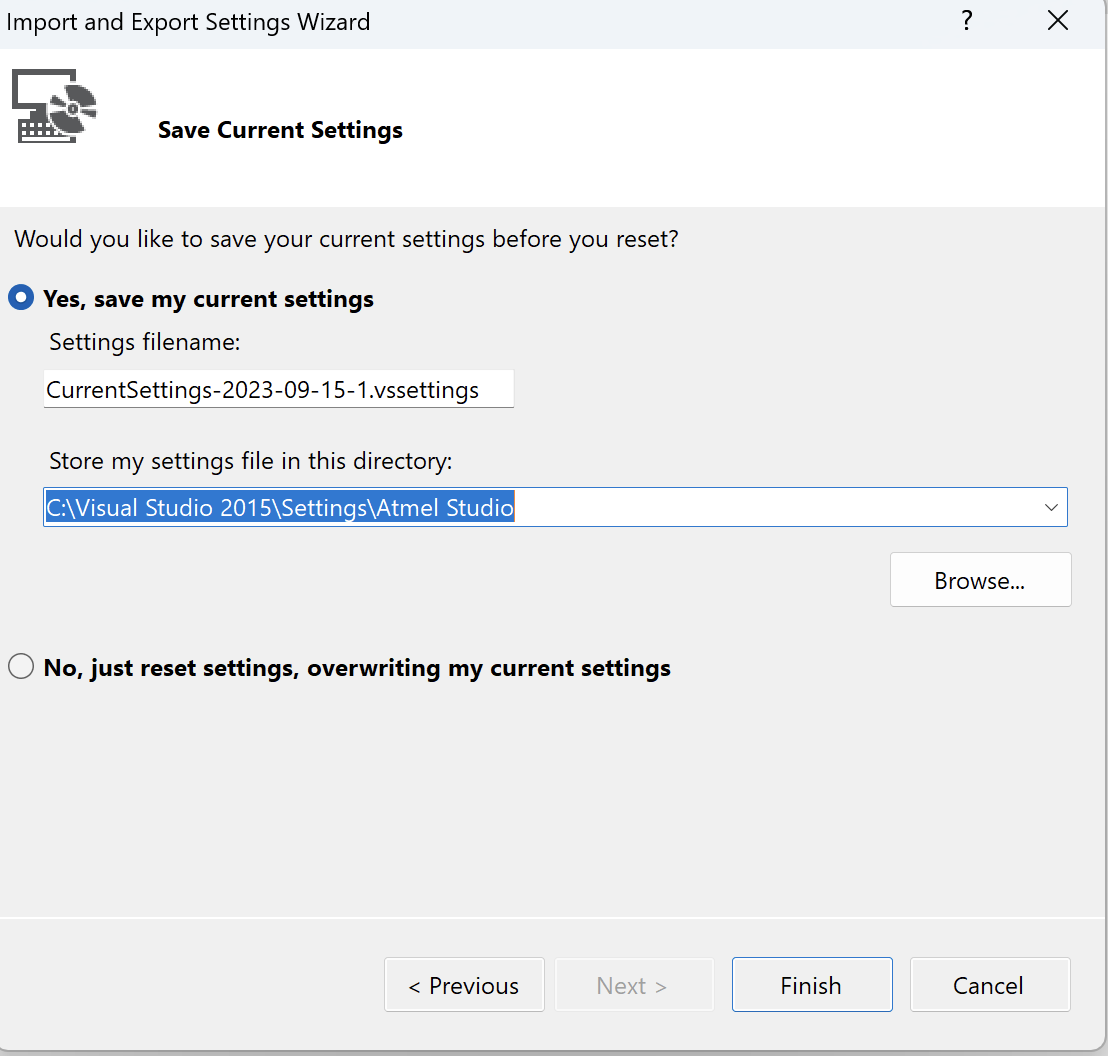
Click on Tools - Import and Export Settings..., then select Reset all settings and click Next >, then select Yes, save my current settings and set a directory inside this Windows VM at Store my settings file in this directory:, then click Finish (click Yes if there are any warnings).
Restart Microchip Studio, and you will find that the warning has disappeared.
Create a New Project
We should create a new project to solve the problem of missing information and breakpoints not working correctly. Create a new project and specify a directory that is located inside the VM at Location:.
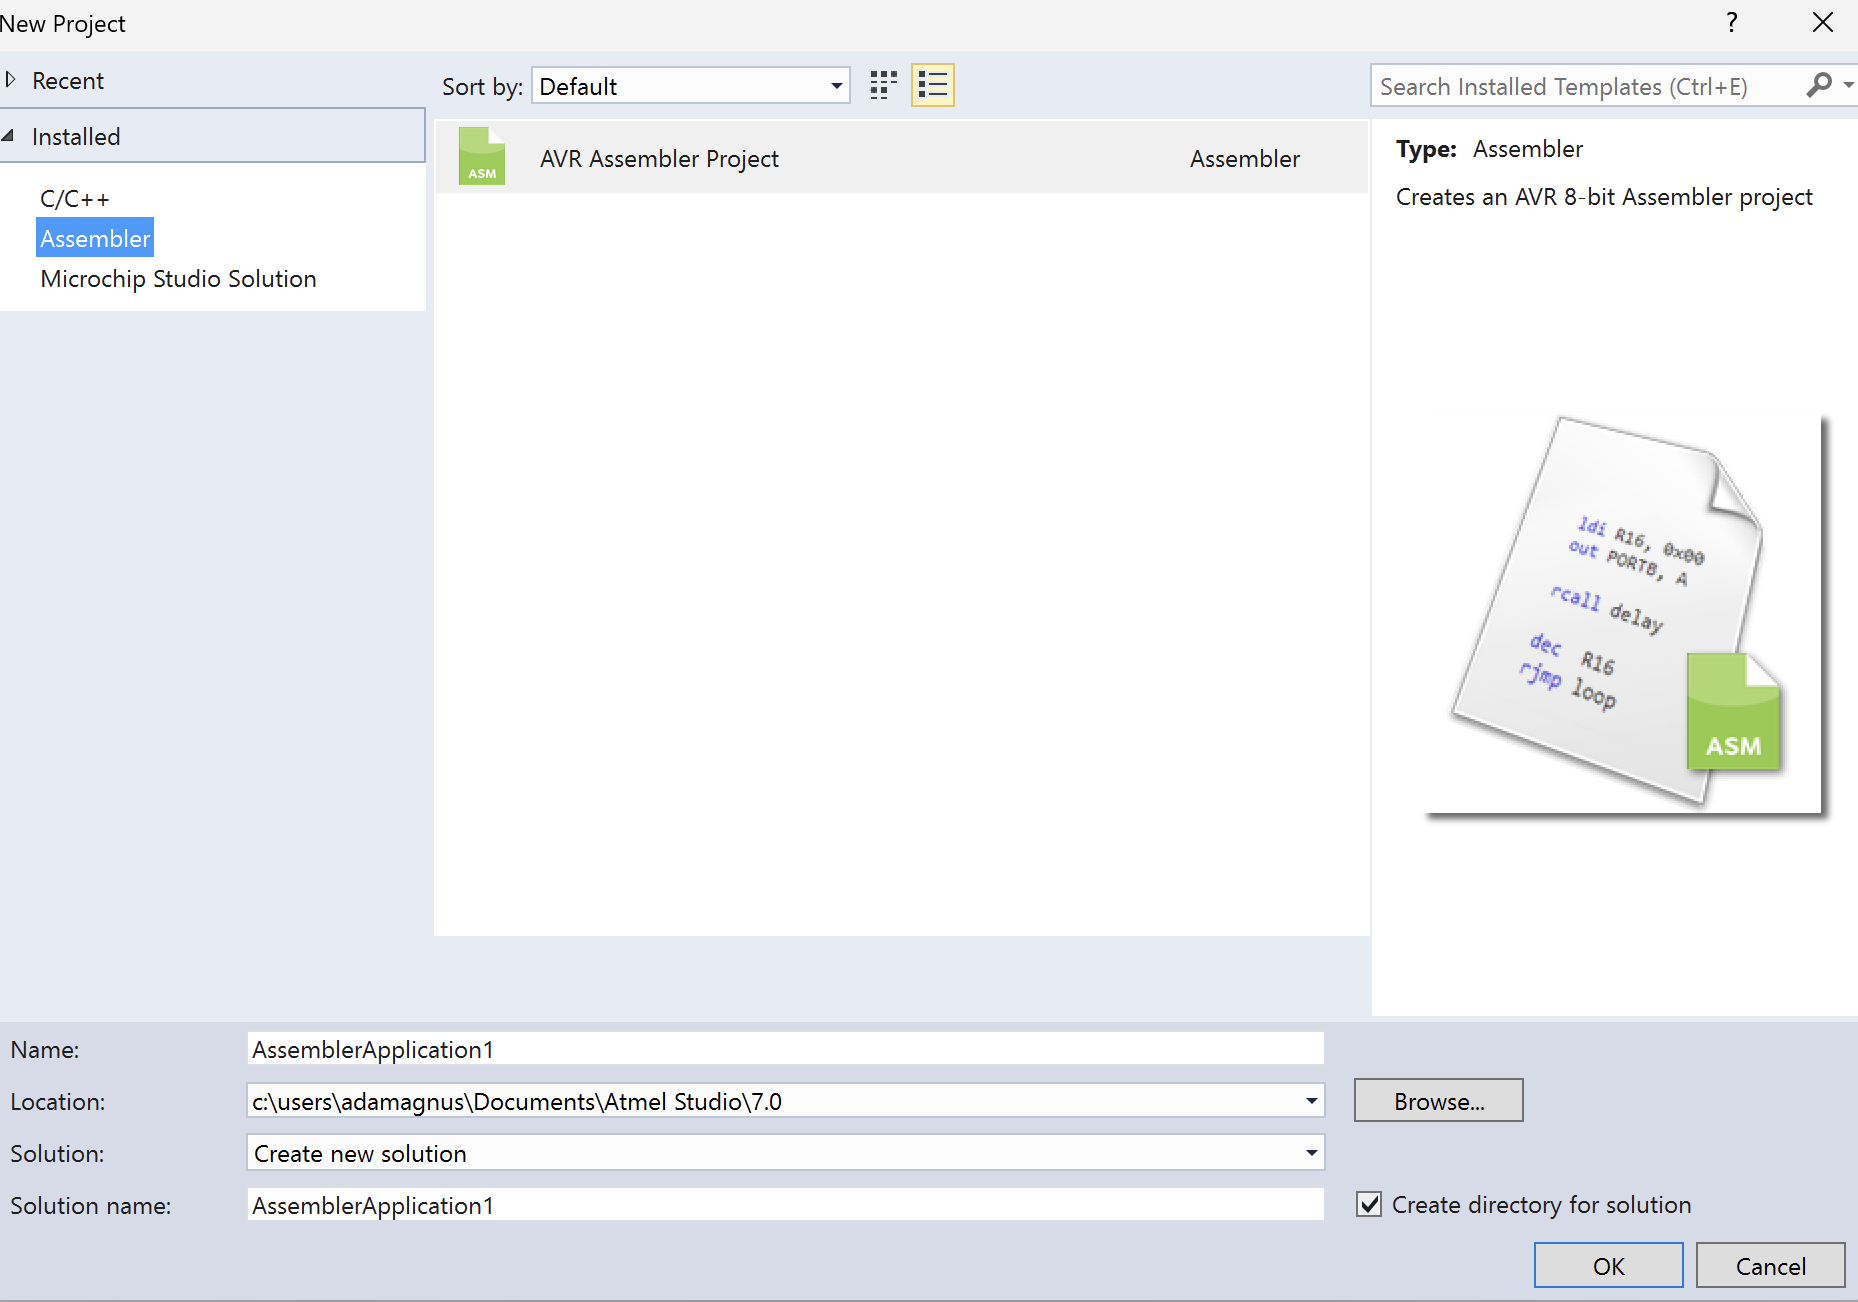
The problems should be solved in this new project.
Root Cause of these Problems
Parallels Desktop transfers the file system of macOS into remote directories that can be accessed by SMB. It also provides macOS directories regularly to software in VMs. However, Microchip Studio can’t recognize such directories, and the default configuration file can’t be found as a result. Microchip Studio then fallback to default configurations, which caused these problems.
It can be seen that if some project is saved to a macOS directory, Microchip Studio will not be able to build this project correctly, which leads to missing information and breakpoint disorder.
Appendix 1: The Troubleshooting Process
- Troubleshoot problems with the project itself: I created a new project and copied and pasted the code into it, but it didn’t solve the problem.
- Troubleshoot problems with the code: I changed the code to the default code of Microchip Studio, but it didn’t solve the problem.
- Troubleshoot problems with the OS: I tried Microchip Studio on another Windows 11, and there was no problem.
- Troubleshoot problems with VM and installation: I created a new Windows 11 VM and reinstalled Microchip Studio, but it didn’t solve the problem.
- Try to solve the warning: After noticing that the Microchip Studio installed on the new VM also generates a warning while starting, I tried to solve it by resetting the configuration. The problems were solved after I reset the configuration and saved the configuration file inside the VM.
Appendix 2: How to Reproduce these Problems
- Create a Windows 11 VM with Parallels Desktop.
- Install the last version of Microchip Studio on the VM.
- Run Microchip Studio and click
OKwhen the warning is produced. - Create an Assembler project and choose the
ATmega2560as the target device. - Try to build and debug this project.